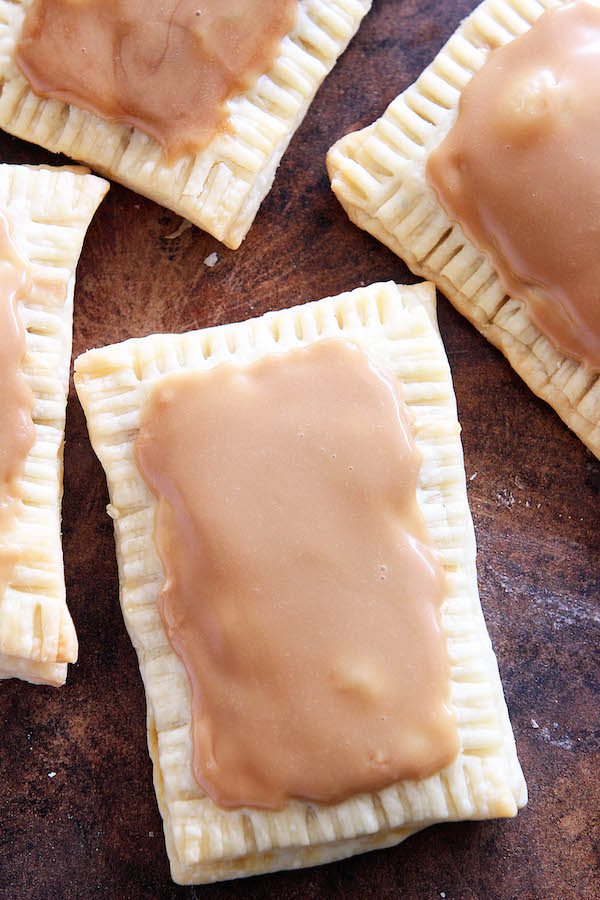
These Maple-Glazed Pumpkin Poptarts are made with pie crust, stuffed with a maple and pumpkin filling, and topped with a delicious maple glaze.

 Do you love poptarts as much as I do? I remember in high school, my best friend and I would save our change and split one from the vending machine and every time, it was a little taste of heaven. Those babies are delicious! Too bad they didn’t have these Maple-Glazed Pumpkin Poptarts though. They’re better than any poptart I’ve ever bought! {Including the cinnamon roll ones. *gasp*}
 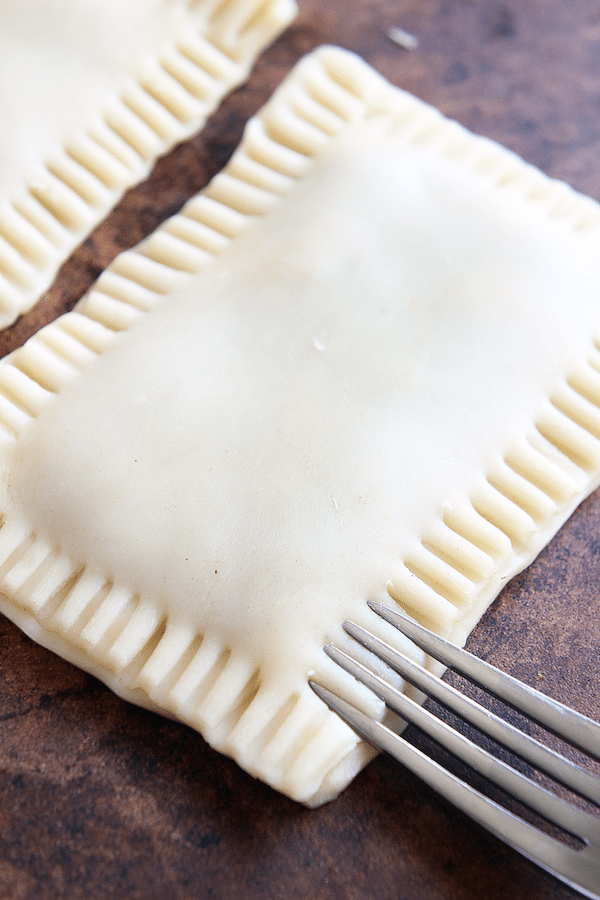 One taste of these Maple-Glazed Pumpkin Poptarts and you’ll be hooked for life. They’re flaky, perfectly crisp and chewy, and taste like fall in your mouth. Zach dubbed them as one of best things I’ve ever made on the blog and not to toot my own horn or anything, but he might be right.
Don’t forget to pin this for later to your favorite Pinterest board.

Maple-Glazed Pumpkin Poptarts
These Maple-Glazed Pumpkin Poptarts are made with pie crust, stuffed with a maple pumpkin filling, and topped with a delicious maple glaze.
Prep Time 15 minutes
Cook Time 10 minutes
Total Time 25 minutes
Servings 4 poptarts
Calories 336 kcal
Ingredients
- 1 refrigerated pie crust roll {found near the refrigerated biscuits}
- 1/2 cup canned pumpkin
- 1/3 cup brown sugar packed
- 1/2 tsp. maple flavoring
- 1/4 tsp. pumpkin pie spice
- dash of salt
Glaze
- 1/2 cup powdered sugar
- 1/4 tsp. maple flavoring
- 1 Tbsp. milk
Instructions
-
Preheat oven to 375ºF.
-
In a medium bowl, combine pumpkin sugar, maple extract, pumpkin pie spice, and salt. Mix completely and set aside.
-
Turn your pie crust out onto a floured surface. With a rolling pin, roll your crust into a very thin rectangle, 6x22 inches. Cut into 8 even rectangles.
-
Place a rectangle on a baking sheet and spoon a large dollop of pumpkin mixture into the center of it, leaving enough room for the crimping.
-
Top with another pie crust piece and press down on the edges.
-
Using a fork, crimp the edges by placing the tip of your fork about 1/2 inch over the edge of the poptart, as pictured above.
-
Repeat these steps for the remaining 3 poptarts.
-
Bake for 9-11 minutes, until edges are lightly browned.
-
In a small bowl, mix together all the ingredients for the glaze. Once poptarts have cooled, spoon the glaze over the top of them and wait until glazed hardens. Enjoy!
Nutrition Facts
Maple-Glazed Pumpkin Poptarts
Amount Per Serving
Calories 336
Calories from Fat 99
% Daily Value*
Fat 11g17%
Saturated Fat 4g25%
Polyunsaturated Fat 1g
Monounsaturated Fat 5g
Cholesterol 1mg0%
Sodium 183mg8%
Potassium 136mg4%
Carbohydrates 56g19%
Fiber 2g8%
Sugar 34g38%
Protein 3g6%
Vitamin A 4773IU95%
Vitamin C 1mg1%
Calcium 38mg4%
Iron 2mg11%
* Percent Daily Values are based on a 2000 calorie diet.
These really do look amazing! I plan on surprising my kids with these as their after-school snack one day this week. I’m so excited to give them a try 🙂
Yay! I hope they love them! 🙂
I didn’t get around to making these until today but they turned out great! The kids loved them and are already asking when we can have then again. Thanks for the recipe!
ooh these look really good!
Saw this on pintrest looks awesome. Great photos. Lover anything maple.
Okay, this may be a little cornball, but I could totally see myself making these as part of back to school breakfasts for little ones, to eat on the way to school. Great recipe, I am totally going to use this!
Could you use maple syrup and powdered sugar for the glaze?
Is there a way I can make it without the pie crust? Do you have a recipe for pie crust I could use that would work?
I just came across these and I’m making them during the day for the week ahead. Can I freeze these or would they not hold up well? Can I pop them into a toaster after thawed?
What is maple flavoring? Is it maple syrup? I love how these are homemade!
Hi! I’m hoping to make these for thanksgiving, but I had a few questions. How far in advance can I make these? Can they be stored at room temperature or do I need to refrigerate them?
I made these and they were delicious! I didn’t have access to maple extract so I used pure maple syrup instead, and I was using frozen, preshaped pie crusts, so I decided to cut out circle shapes. They turned out great!
Wow how yummy! These look so delicious I can’t wait to try and make them!
Making this for breakfast. Excited to try them. I think the grandkids will love them! Thanks for the idea!
When you say maple flavoring is that an extract or maple syrup?
Do you think using real maple syrup rather than maple flavoring could work?
I can’t wait to make these for Sunday school quiet seat prizes! The kids love homemade goodies!
How can I make these with real maple syrup?
Could you use maple syrup I’m place of the brown sugar and maple flavoring for the filling? Cannot wait to give these a try. Thank you for sharing.
Do these have to be refrigerated??
This looks delicious! Could you use real maple syrup in place of maple flavoring?
Thanks for sharing! Does it keep long?
This looks so good! What a fun recipe to make with kids!
Thanks for sharing! Does it freeze well?